The EVERSLIDE Plastic Matting System is easy to install. No specialist skills or special tools are needed. By agreement, we can also provide on-site installation supervision to ensure the correct operation of your EVERSLIDE products.
The slope, on which the plastic matting is mounted, should be stable and even. Therefore, it is recommendable to construct the slope on either concrete or impregnated wood. Smaller slopes may even be constructed on compact and even natural ground. The construction of the slope should comply with the FIS slope building standards.

A 20-millimetre-thick foam mat is rolled out horizontally on the concrete or wooden surface to make the matting construction resilient. Due to thermal expansion, the mats should be cut in 5-8-metre-long sections. We also suggest using a gap of 3-5 cm in both vertical and horizontal joints.
The EVERSLIDE products are easy to install!
The fastening net is then rolled out on the foam mats. It must be installed absolutely horizontally and perpendicular to the centre line of the landing hill, to ensure that the elements are also fastened properly and installed horizontally.
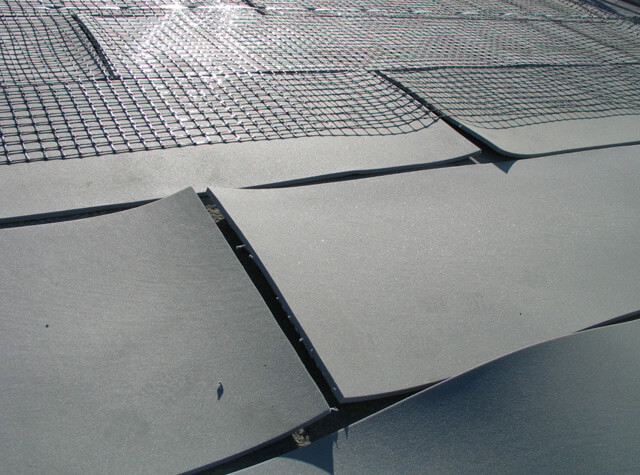
At the joints, the fastening nets shall overlap by 1-2 mesh cells. A galvanised steel band is threaded through the pieces of the mesh in the joints of each fastening net. The fastening net should then be drawn tight and fastened, along with the foam mat, to the structure with anchor bolts or screws at every 0.5 meters.

The EVERSLIDE matting elements and the safety plates below are fastened to the fastening net at the same time. Note that the ribs of the safety plate must face downwards.
In an optimal installation, approximately 3.2 elements per plastic matted sqm are needed.

The EVERSLIDE matting elements and safety plates must be fastened to the fastening net in every 5th mesh with cable ties (four cable ties per full-sized matting element). For larger slopes, five cable ties per element are used on the area where the ski-jumpers most commonly land. Cut-off sections of the matting elements (less than half the size of normal elements) can be fastened with three cable ties.

Installation should be started at the bottom left corner of the landing area. The first row is to be started with a full-size matting element and a safety plate. The cable ties should be fastened and tightened to both ends of the element first. Then the cable ties can be fastened in the middle of the element and tightened.

The safety plate that comes under the next matting element should be placed about 1 cm below the previous safety plate so, that the edge of the safety plate touches the first rib of the previous matting element. The ribs below should not extend over the safety plate to be installed. The matting element and the safety plate are then fastened as described in the previous step (Step 6).

The first row is then completed until the end. The last matting element of the row must be cut to fit. The elements may be cut e.g. with a metal-cutting saw and the safety plates with a carpet knife. If the piece cut off is larger than a third of the matting element’s size, the next row can be started with this piece. Otherwise, the row is started with a half of a matting element. The installation of each row should start at the left.


